When moving from Payments & Invoicing to Bill Pay, you’ll use your Export Records Report to help re-enter your vendors quickly and accurately.This guide walks you through two common scenarios.
Jump to:
- Before You Start
- Adding a Vendor Found in the Bill Pay Network
- Adding a Vendor Not Found in the Bill Pay Network
- Helpful Tips
Before You Start
Make sure you have:
- Your Export Records Report open
- Access to Bill Pay in Online Banking
Adding a Vendor Found in the Bill Pay Network
- Find the Vendor Name.
- Use Column B on the export report.

- Use Column B on the export report.
-
Search for the Vendor in Bill Pay.
- Enter the vendor name.
- Select Search Our Network.
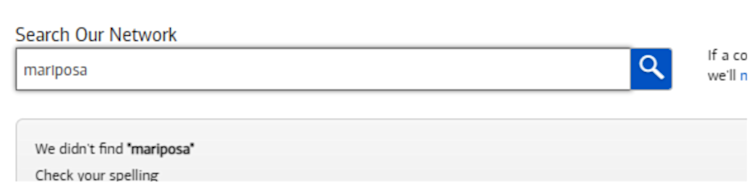
- If the vendor appears, select Continue.
- If your vendor doesn't appear, move to the section below to add the vendor.
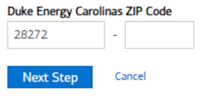
- Enter Your Account Number.
- Use Column F on the export report.
- Enter the ZIP Code.
- Use Column Q on the export report.
- Select Next Step.
- Request an Authorization Code.
- Follow the on-screen instructions.
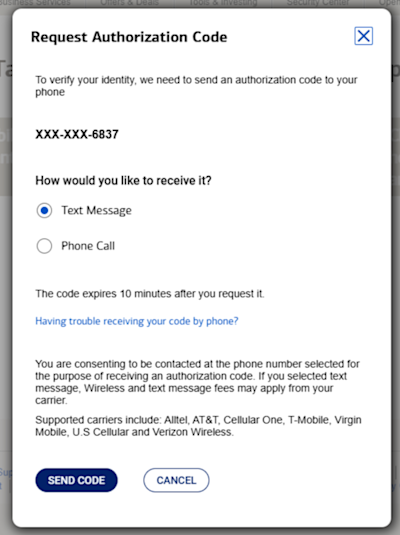
- Follow the on-screen instructions.
-
Finish Up
- Once authorization is successful, you can:
- Make a payment now
- Or finish later
- Once authorization is successful, you can:


Adding a Vendor NOT Found in the Bill Pay Network
Use this option when the vendor does not appear in Bill Pay network search results.
- Find the Vendor Name.
- Use Column B on the export report.
- Use Column B on the export report.
-
Search for the Vendor in Bill Pay.
- Enter the vendor name.
- Select Search Our Network.
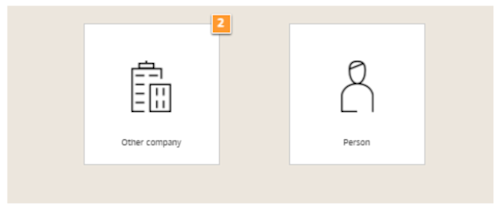
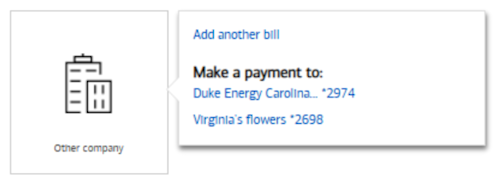
- Select Other company or Person.
- Select Add bill or Add another bill.
- Enter vendor information using your export report:
- Account Number: Column F
- Address: Column K
- City: Column O
- State: Column P
- ZIP Code: Column Q
- Phone Number: Column U
- Email Address: Column S
- Select Next Step.
- Request an Authorization Code.
- Follow the on-screen instructions.
- Follow the on-screen instructions.
-
Finish Up
- Once authorization is successful, you can:
- Make a payment now
- Or finish later
- Once authorization is successful, you can:


Helpful Tips
- Keep your Export Records Report open while adding vendors.
- Enter details exactly as listed to avoid delays.
- You can add vendors over time — you don’t have to finish everything at once.
- Payments cannot be made until the vendor setup is complete.
You’re Almost Done!
Once your vendors are added, Bill Pay makes it easy to manage and schedule payments all in one place.